IR setup

All posts related to air-guns (air-rifles, airsoft, air-pistols, air-guns etc.).
moulindu
Almost at nirvana
Almost at nirvana
Posts: 230
Joined: Wed Aug 01, 2012 1:11 pm

Re: IR setup

Post by moulindu » Mon Apr 28, 2014 1:50 pm

Hi
essdee1972 wrote:The car rear view screen idea seems to be good. But these will be available in car parts shops rather than electronics stores. Else ebay to the rescue!
Essdee da I have checked the ebay store they are ok for tft/lcd screen & wiring but the IR camera is below have to go with bullet camera individually.

Thanks Pratikji my cousin brother is studying in IIT B ,I will ask him to have a check at those products, by the way do they ship it outside Maharashtra?
Regards

For Advertising mail webmaster
moulindu
Almost at nirvana
Almost at nirvana
Posts: 230
Joined: Wed Aug 01, 2012 1:11 pm

Re: IR setup

Post by moulindu » Sun Jul 06, 2014 1:28 am

Well after lot of search of the proper attachments my pretty lady is almost ready for the party. Haven’t shot any pellets through it as the building process took most of the time. Since waiting for the next world cup match & need to keep myself busy thought of posting some of the pics. The power source (battery) ordered from DX got sent back by customs, so had to make temporary solution using a 12V, 7Ah battery from by bike. Though it is not handy but at the time of despair it helped me setting up the rig. I adopted the idea from Rolaid (Youtube) & I really thank him for such a nice innovation. Not sure whether it will sustain the recoil of a springer, but keeping my fingers crossed and hopefully it will work in my favour.
Regards Moulindu
Image
Image
Image
Without IR illuminator
Image
With IR Illuminator
Image

moulindu
Almost at nirvana
Almost at nirvana
Posts: 230
Joined: Wed Aug 01, 2012 1:11 pm

Re: IR setup

Post by moulindu » Tue Jul 29, 2014 6:25 pm

Hi
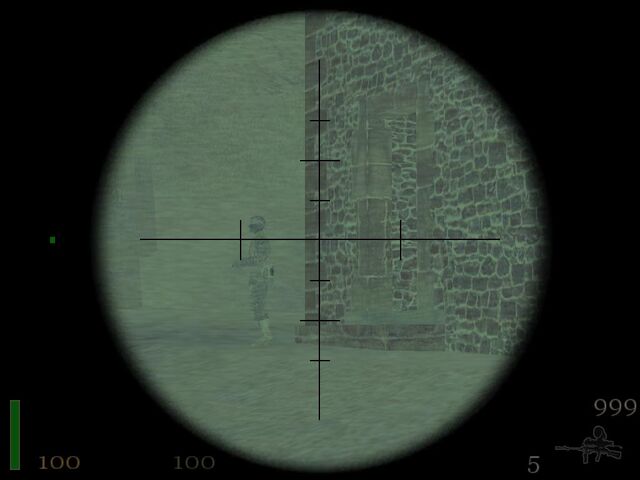
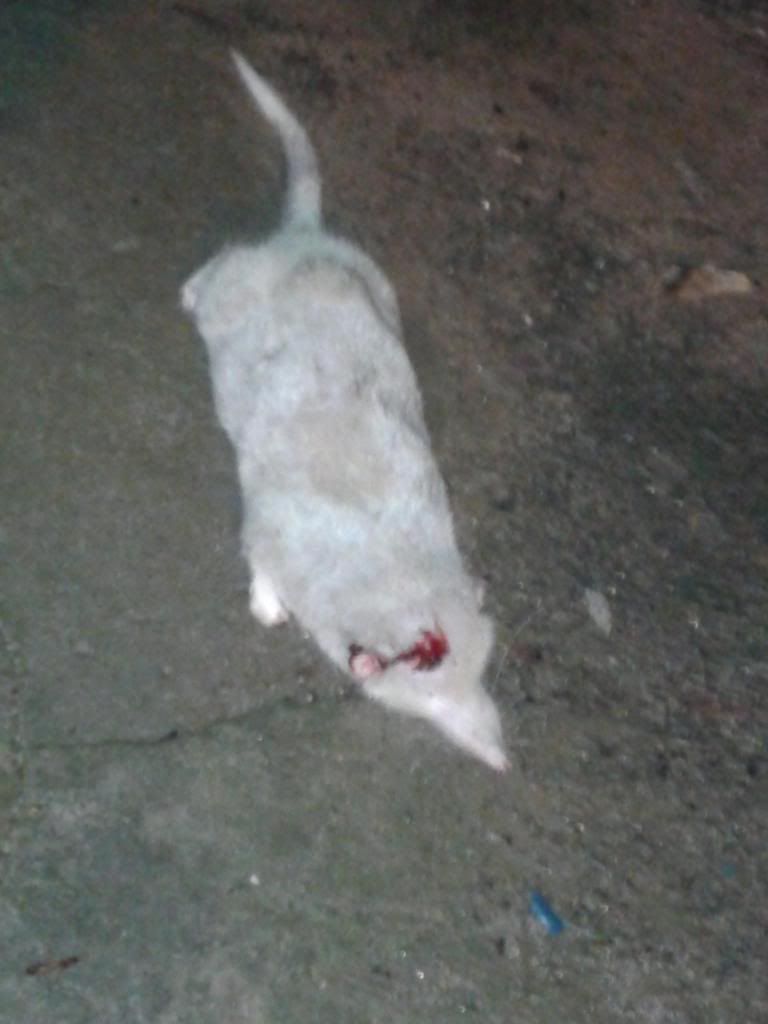
Here is the cleaned up version of the NV setup. The final addition is the battery. Viewed but not shot at a distance of 25mts & it is more than descent in identifying the target. So here are the parts used in building the rig

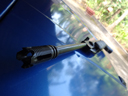
Camera: - The bullet camera used is 1/3 SONY 700TVL with 12 mm lens (rating 12v, 60mAh). It has sensitivity to capture pics at 0.0003Lux. The IR filter of the camera is removed by the seller so as to view IR light. The dia. Of the camera is 20 mm so shim is provided using medical tape. It is fixed behind the eye piece at the best possible eye relief. It is attached to the rail using 1” mount.
http://i1352.photobucket.com/albums/q64 ... 54aae1.jpg
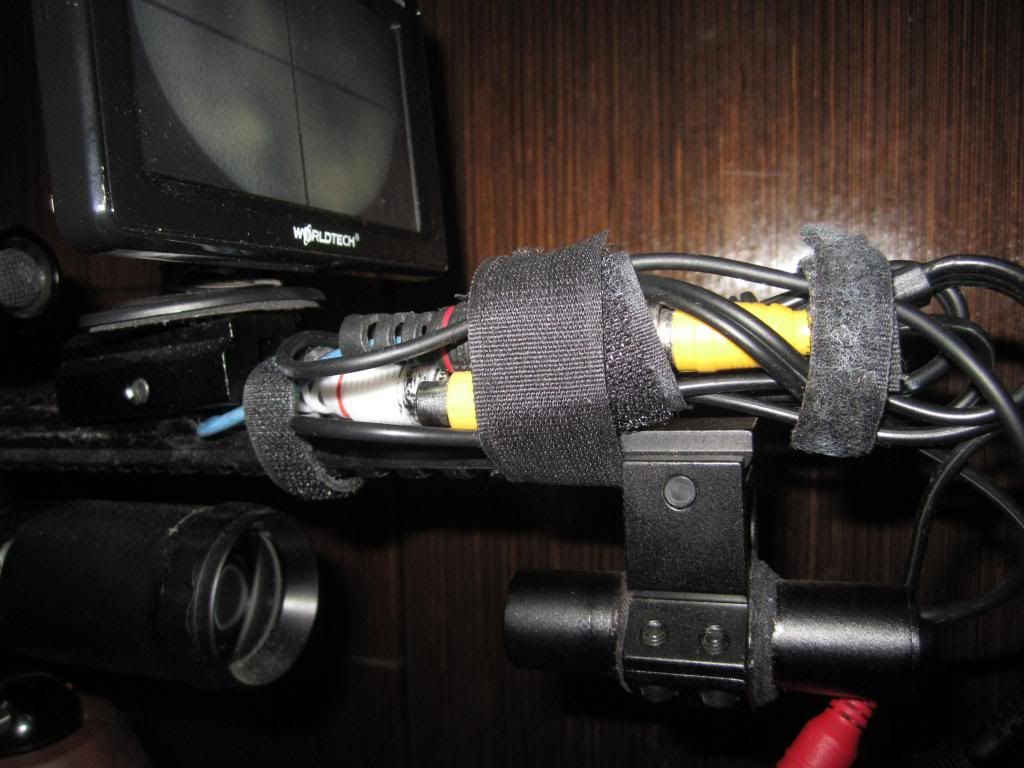
LCD/TFT monitor: - The monitor has 4.3’’ screen with both NTSC & PAL input facility (rating 12v, 70mAh) . Its a colour monitor used for rear view while parking. I have purchased a camera mount adapter with 2 holes on the top. I drilled a hole on the base of the monitor stand & fixed it with a nut & bolt to the adapter. The adapter then sits on the picatinny rail.
http://i1352.photobucket.com/albums/q64 ... 32a165.jpg
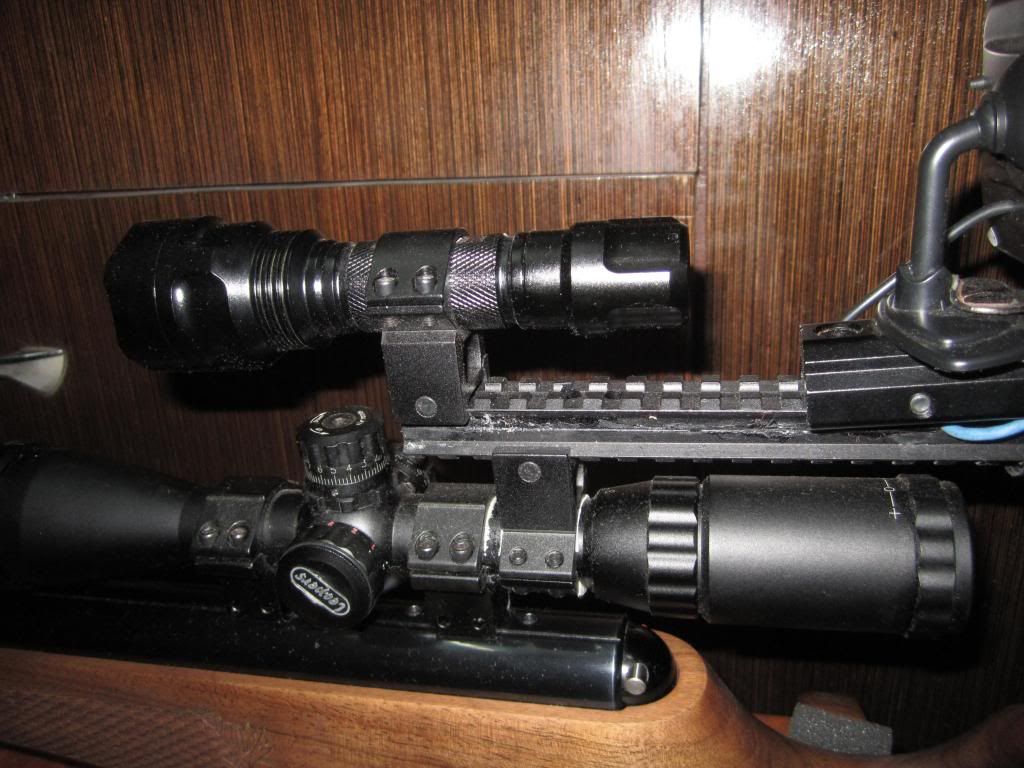
IR Illuminator: - IR Illuminator/torch or laser is of 840nm wavelength with 5watt capacity & requires 3.7 v. 18650 battery. There are many options for power for the IR Illuminator/torch from 2, 3, 5 watt etc. The more the power the quickly the battery will burn. Bought 3 of those batteries having 3000mAh along with a charger. With each battery the illuminator runs for around 1hr.
http://i1352.photobucket.com/albums/q64 ... 0a8d07.jpg
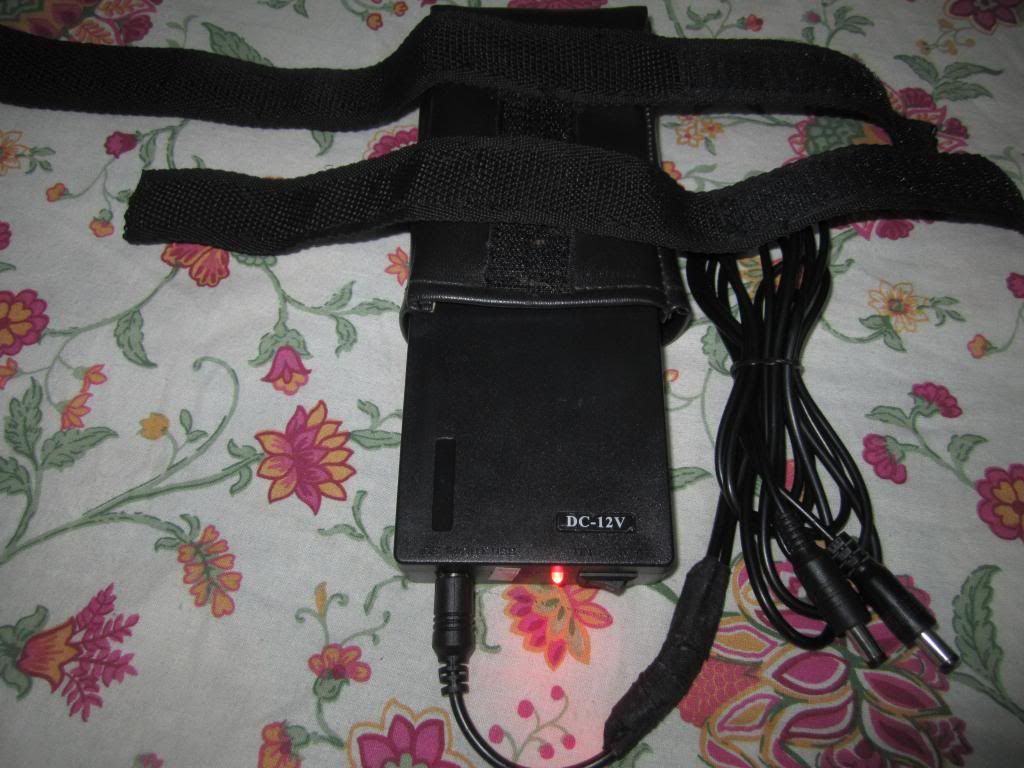
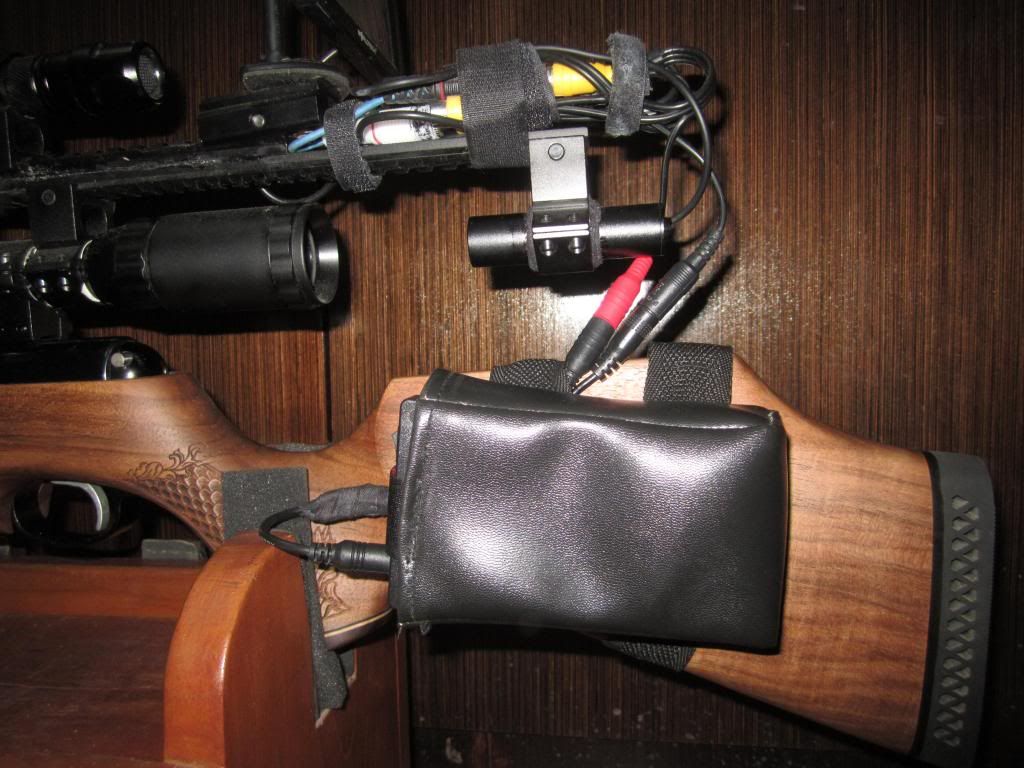
Battery: - For powering the bullet camera & monitor I bought a 12v 4500mAh Li ion rechargeable portable battery. It is of the size of an external hard disk. It comes with a charger & chord for power supply for only single source. Have to make a 2 way splitter & save some penny or can buy a splitter from electronics shop. Got a pouch prepared from the leather shop for accommodating the battery. Stitched Velcro to the bag straps & stitched the strap to the pouch for holding it to the gun.
http://i1352.photobucket.com/albums/q64 ... 7d5275.jpg
http://i1352.photobucket.com/albums/q64 ... 364d4f.jpg
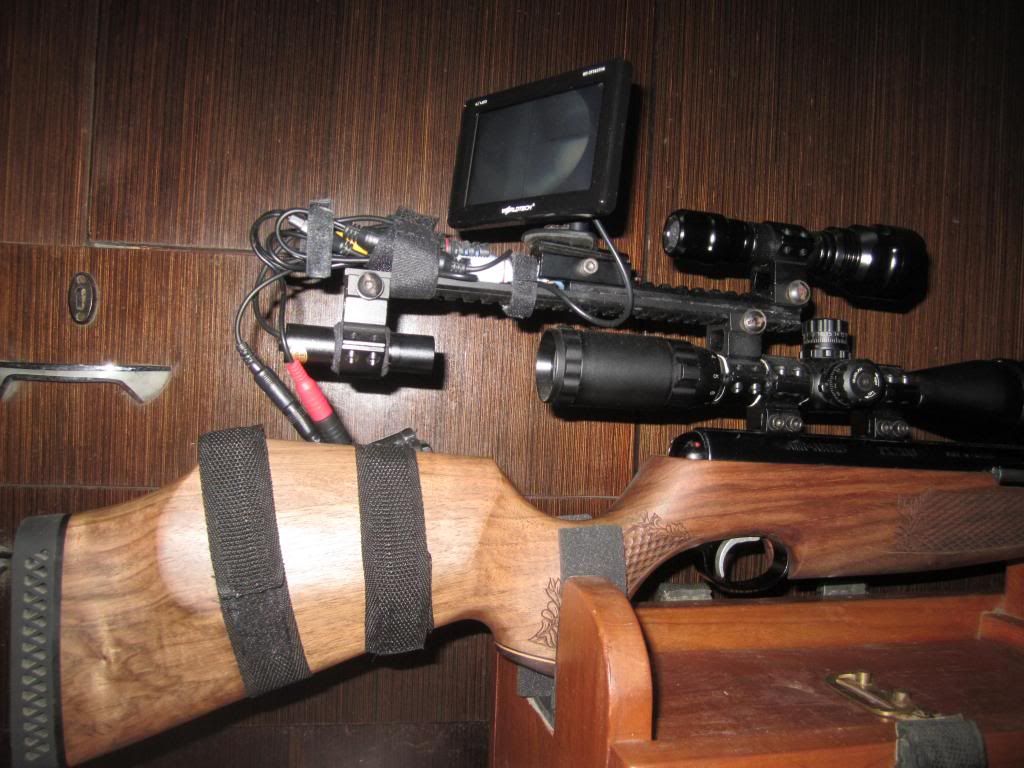
Picatinny Rail: - Bought 2 picatinny rails 1 measuring 25cm & other 15 cm & couple of pairs of 1” picatinny mount. If the length of the longer rail is more than 25cm then it will interfere with the elevation turrets, in that case mount risers will help. Used araldite to fix the rails from one end (one can drill & tap as well). The longer rail is kept downwards & at the end the bullet camera is fixed at suitable eye relief with the scope using a 1” mount. The other end is fixed with the scope in the upside down way. The shorter rail is used to attach the IR Illuminator in the front (using a 1” mount) & LCD/TFT monitor in the end with sufficient space for changing of battery.
http://i1352.photobucket.com/albums/q64 ... 48e3c2.jpg

Regards Moulindu

User avatar
estousandy
One of Us (Nirvana)
One of Us (Nirvana)
Posts: 399
Joined: Fri Oct 23, 2009 3:41 pm
Location: KL

Re: IR setup

Post by estousandy » Tue Jul 29, 2014 6:57 pm

Congrats man it came out really well. I'm sure it'll be further miniaturized in times ahead. It helps to minimize any plays that'll creep in.

Some way to record the action would be a cool plus.

Get under a black wrap & go for the kill. Cats, dogs & ghosts would still see you though! Or if lucky, you might end up seeing that last kind! ;)
with guns we are citizens, without we are subjects

moulindu
Almost at nirvana
Almost at nirvana
Posts: 230
Joined: Wed Aug 01, 2012 1:11 pm

Re: IR setup

Post by moulindu » Tue Aug 12, 2014 12:25 pm

Hi
Thanx man
estousandy wrote:Some way to record the action would be a cool plus.
yes you can mount a DVR instead of a LCD/TFT screen & record the shooting but it might cost a little more. my total expenditure was around Rs 12000 with shipping.
estousandy wrote:Get under a black wrap & go for the kill. Cats, dogs & ghosts would still see you though

OOO afraid of them, but got invitations from my relatives to eliminate the rodent problem after they saw my termination of rodents at home:wink:
regards Moulindu

User avatar
brihacharan
Old Timer
Old Timer
Posts: 3112
Joined: Fri Jan 22, 2010 3:33 pm
Location: mumbai

Re: IR setup

Post by brihacharan » Tue Aug 12, 2014 12:39 pm

moulindu wrote: OOO afraid of them, but got invitations from my relatives to eliminate the rodent problem after they saw my termination of rodents at home:wink:
regards Moulindu
> Really appreciate your steadfast & innovative approach in rigging the IR gizmos :D
Image
> Beware there's A Rodent Terminator "At Large" ROTFL
Briha

User avatar
estousandy
One of Us (Nirvana)
One of Us (Nirvana)
Posts: 399
Joined: Fri Oct 23, 2009 3:41 pm
Location: KL

Re: IR setup

Post by estousandy » Tue Aug 12, 2014 2:46 pm

& now that u said rigging, the setup reminds me of this! The OSA Snooper rifle from Return to Castle Wolfenstein.

Image
Image
with guns we are citizens, without we are subjects

moulindu
Almost at nirvana
Almost at nirvana
Posts: 230
Joined: Wed Aug 01, 2012 1:11 pm

Re: IR setup

Post by moulindu » Wed Aug 13, 2014 2:18 pm

Hi estousandy
Thanks for taking me down to the memory lane. Played this FPS (First Person Shooting) game a lot during my college days, but now FPS means a whole different thing for me now :D
Well i have couple of links for your interest
http://www.pyramydair.com/a/Accessories ... finders/67
http://www.nitesite.com/products/scope-mounted
The problems may be custom interfering with the package as they will definitely think NV are deadlier weapon than scopes.
Price can be taken into account with considering shipping cost & import tax (if at all they let NV through) & the last of all is it might not be springer rated so have to be specific to use on a PCP
regards Moulindu

moulindu
Almost at nirvana
Almost at nirvana
Posts: 230
Joined: Wed Aug 01, 2012 1:11 pm

Re: IR setup

Post by moulindu » Mon Sep 01, 2014 1:42 pm

brihacharan wrote: [ Image ]
> Beware there's A Rodent Terminator "At Large" ROTFL
Briha
The rodent terminator did get loose last weekend & bagged 8 mice with 2 nights sitting at my uncles place of around 6 hours. Dont want to break any rules but if admin permit would like to post few pics.
regards Moulindu

User avatar
estousandy
One of Us (Nirvana)
One of Us (Nirvana)
Posts: 399
Joined: Fri Oct 23, 2009 3:41 pm
Location: KL

Re: IR setup

Post by estousandy » Mon Sep 01, 2014 2:41 pm

Please go ahead man. I guess here vermins are expendable.

And yes, importing those NV gear will definitely get law abiding citizens in trouble. Not so much for baddies.

A plug. This is something i did back in my early college years. A very rudimentary night vision setup with whatever was available lying around. More details in youtube description.

[youtube][/youtube]
with guns we are citizens, without we are subjects

User avatar
brihacharan
Old Timer
Old Timer
Posts: 3112
Joined: Fri Jan 22, 2010 3:33 pm
Location: mumbai

Re: IR setup

Post by brihacharan » Mon Sep 01, 2014 5:24 pm

estousandy wrote: Please go ahead man. I guess here vermins are expendable.
And yes, importing those NV gear will definitely get law abiding citizens in trouble. Not so much for baddies.
A plug. This is something i did back in my early college years. A very rudimentary night vision setup with whatever was available lying around. More details in youtube description.
[youtube][/youtube]
A very remarkable DIY Sandip!
Can NV work in 'pitch dark' or it does only on low light?
Just curious :D
Briha

User avatar
estousandy
One of Us (Nirvana)
One of Us (Nirvana)
Posts: 399
Joined: Fri Oct 23, 2009 3:41 pm
Location: KL

Re: IR setup

Post by estousandy » Mon Sep 01, 2014 6:06 pm

Thanks Briha! : )

I used Active Illumination, ie bathing the field with Infrared beam. Its reflection is captured by the cam sensor so it'll work in 'pitch dark'. Note the video description:
A very low cost setup using a cheap logitech webcam with IR filter removed, 8 standard remote class IR LEDs stuck around cam, motorised(gear) swivel mount & a FW/BW wired remote control from a cheap toy car.
The downside is, eventhough mostly invisible to naked eye, these standard IR LEDs are very weak and emit a faint red glow when observed upclose. Also, it can be easily picked up as a bright spot by animals & other cameras.

Solution to this is passive illumination which uses image intensifier tubes but then it goes into prohibitive cost & export restrictions. IA use it alot in ops.

@moulindu used a similar active illumination setup in a much much more refined way with the correct gadgets, and adapted it for another specific task.
with guns we are citizens, without we are subjects

moulindu
Almost at nirvana
Almost at nirvana
Posts: 230
Joined: Wed Aug 01, 2012 1:11 pm

Re: IR setup

Post by moulindu » Wed Sep 03, 2014 11:57 am

Hi
Impressive Sandy, have u tried to range its illumination with or without a scope
estousandy wrote:Solution to this is passive illumination which uses image intensifier tubes but then it goes into prohibitive cost & export restrictions.
Well there were no issues when i ordered my IR torch, but should specifically go for 840nm wavelength as the 9 series are visible to animals. Though there is a faint red glow in the torch but a distance of 10 to 20 mts its hardly visible or atleast in my case the vermints didnt see it coming.
I have got a site in india for IR torches check it out
http://lightorati.in/flashlights/ir-lights.
or you can always get one from aliexpress or DX
Another way of mounting a rig is "YES" the way u did your rig with a digi cam with the IR filter removed. Here is the link of those vdos

One can mount that digicam to the scope using a "Seben DKA2 Camera Mount"
http://www.ebay.com/itm/Seben-DKA2-digi ... 588b0f258b

The camera will serve the purpose of both capturing the image & displaying it on the screen. The only thing one will have to do is get an IR torch fix it to the barrel like normal illuminators & VOILA you got a NV rig of your own. Very much doable & affordable. Actually I am planning to do this on my IHP.If i miss something let me know guys.
regards Moulindu

moulindu
Almost at nirvana
Almost at nirvana
Posts: 230
Joined: Wed Aug 01, 2012 1:11 pm

Re: IR setup

Post by moulindu » Wed Sep 03, 2014 12:19 pm

Hi Sandy
estousandy wrote:Please go ahead man. I guess here vermins are expendable.
Posting the pics of the rodents killed at my uncle's place couple of nights before. Viewer's discretion advised.
Admin can delete the pics if they are against the rules of the forum
http://i1352.photobucket.com/albums/q64 ... 1d2e61.jpg
http://i1352.photobucket.com/albums/q64 ... 0b6d7d.jpg
http://i1352.photobucket.com/albums/q64 ... 826012.jpg
http://i1352.photobucket.com/albums/q64 ... 33734c.jpg
regards Moulindu

User avatar
estousandy
One of Us (Nirvana)
One of Us (Nirvana)
Posts: 399
Joined: Fri Oct 23, 2009 3:41 pm
Location: KL

Re: IR setup

Post by estousandy » Wed Sep 03, 2014 12:38 pm

I don't think those IR LEDs illuminated anything more than at 6mtrs. Scope was a fantasy object back in those days.
moulindu wrote: Well there were no issues when i ordered my IR torch, but should specifically go for 840nm wavelength as the 9 series are visible to animals.
Moulindu, IR illumination comes under active illumination which is not at all restricted. But passive illumination using image intensifier tubes is totally different which doesn't need any kind of IR illumination, but needs some kind of low-light like starlight. It is mostly used in mil sights and is closely guarded. Checkout this video.

[youtube][/youtube]

Also, never knew about 840 vs 9xx nm advantage. Thanks for the tip.

Great catch man! These pests are so pesky, except the one from ratatouille :D
Image
with guns we are citizens, without we are subjects

Post Reply